Shopify Custom Checkout Fields for a Florist Ecommerce Website
For creating a Florist Ecommerce website using Shopify one of the requirements may be to add custom checkout fields. These can be for fields such as adding a card message, card signature, tips for the delivery driver, or extra delivery instructions. Let’s look at two ways we can add these fields.
Adding Custom Checkout Fields On The Shopping Cart Page
We’ll start by opening up the Shopify admin panel and going to Online Store and Themes and then Customize
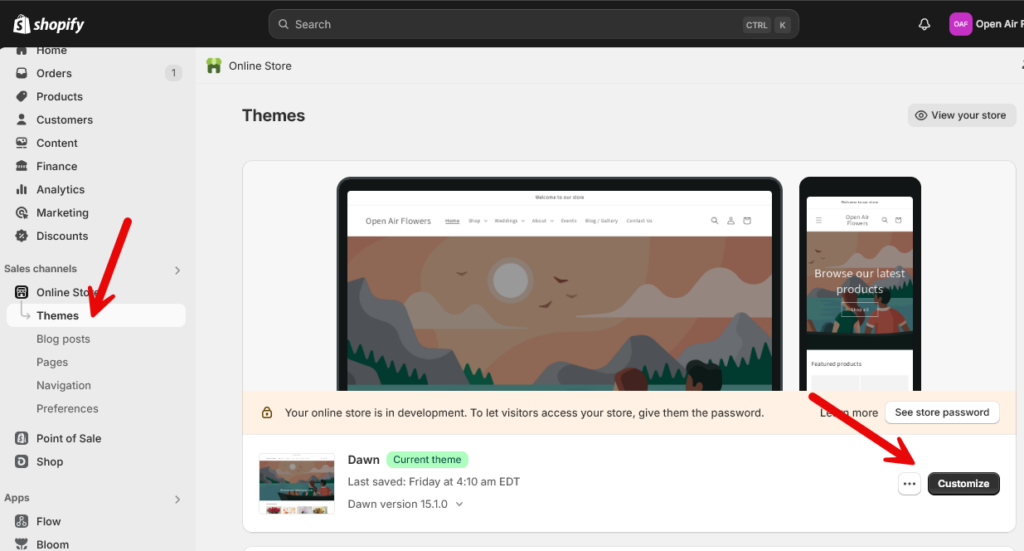
Next click on the … and click “Edit code”. After that expand the “Sections” folder on the left side and click edit (pencil) icon on the main-cart-items.liquid template. From here you’ll want to scroll down on this file to after the </cart-items> area and here is where we will add this code:
					<div class="page-width">
    <div class="cart__card-message">
      <label for="card-message">Card Message (Optional)</label>
      <textarea
        name="attributes[Card Message]"
        maxlength="140"
        id="card-message"
        form="cart"
        rows="4"
        placeholder="Write your card message here (140 character limit)"
      >{{ cart.attributes['Card Message'] }}</textarea>

      <label for="card-signature">Card Signature</label>
  <input id="card-signature" type="text" name="attributes[Card Signature]"  form="cart" placeholder="Enter your name" value="{{ cart.attributes["Card Signature"] }}">

      <label for="special-instructions">Special instructions</label>
      <textarea
        name="attributes[Special Instructions]"
        id="special-instructions"
        form="cart"
        rows="4"
        placeholder="Special instructions Notes to florist, delivery instructions, gate codes, etc."
      >{{ cart.attributes['Special Instructions'] }}</textarea>
    </div>
  </div>
Next click on the “Gear” icon on the left side and expand the Custom CSS code area and put this Custom CSS code.
					.cart__card-message {
  margin-top: 20px;
}
.cart__card-message label {
  display: block;
  margin-bottom: 5px;
}
.cart__card-message textarea {
  width: 100%;
  padding: 10px;
  margin-bottom: 15px;
  border: 1px solid #ccc;
}
.cart__card-message input {
  width: 100%;
  padding: 10px;
  margin-bottom: 20px;
  border: 1px solid #ccc;
}
Let’s review some of this code and see what it is doing. Shopify supports adding custom checkout fields quite easily by making sure to use these two attributes on form fields: name=”attributes[Custom Field Name]” and form=”cart”. The nice thing is these fields will be remembered by Shopify once the customer types them in, and they will also show up on the admin order page and the receipt email.
We also wrap the custom fields in the page-width div so that they have the proper left and right side margins.
As far as the Custom CSS code we are just making sure that the custom fields take up the complete width of the page, and adjusting the border colors of the input fields to be a mid gray instead of black.
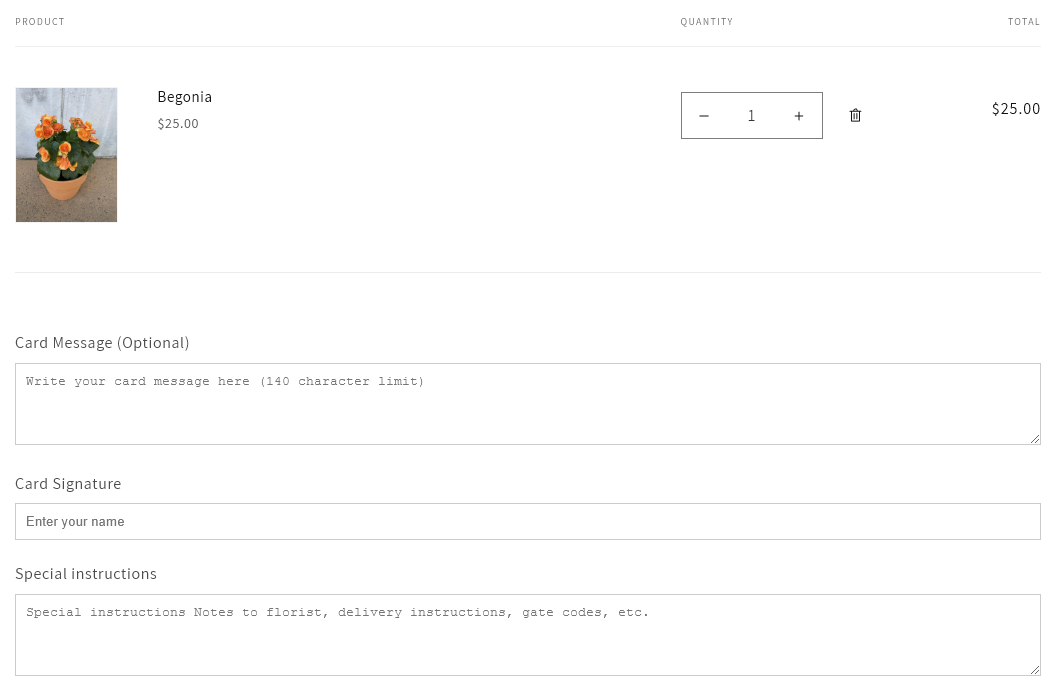
After you are done adding your custom checkout fields it will look something like this:
What Other Apps Might Be Useful for a Florist Shopify Website?
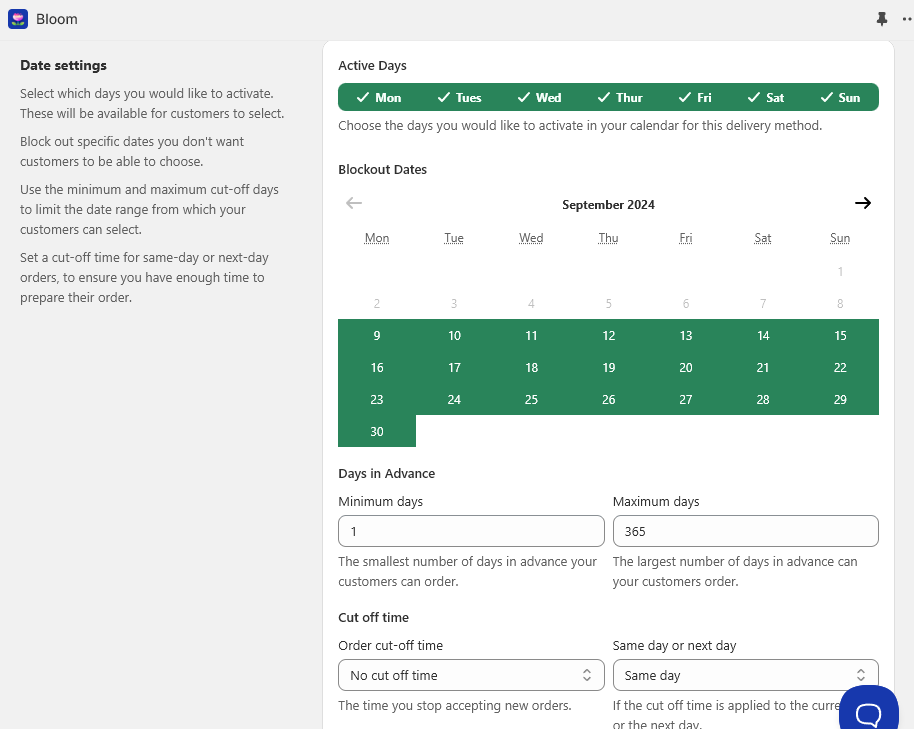
In our experience we have enjoyed using the Bloom delivery scheduling app which helps coordinate the delivery times, how much prep time is needed for your floral arrangements (this can also be adjusted by each flower arrangement instead of globally in case you have different prep times). From the Delivery area you can set the Minimum days, Maximum days, Order cut-off time, and time slots for delivery.
Custom Ecommerce Web Developer for Shopify Florist Websites
I have lots of experience in developing and marketing Shopify Florist Ecommerce websites and developing custom apps. For getting your Florist Ecommerce website going there is no better choice than Kevin Javitz Ecommerce Web Development.